HMI는 Human - Machine Interface의 약자입니다. 말 그대로 인간과 기계 사이에서 인터페이스를 해주는 역할을 맡고 있는데요.
그렇기 때문에 기계, 자동화설비의 간단한 움직임부터 복잡한 연산, 세팅값 등 설비의 모든 것이 다 들어가 있다고해도 과언이 아닙니다.
따라서 설비에 대해 잘 모르는 사람이 이것저것 마음대로 만질 수 없도록 유저등급에 따른 보안설정은 필수인데요.
오늘은 이처럼 중요한 보안설정을 하는 방법을 알아보겠습니다.
먼저 TIA Portal을 실행합니다.
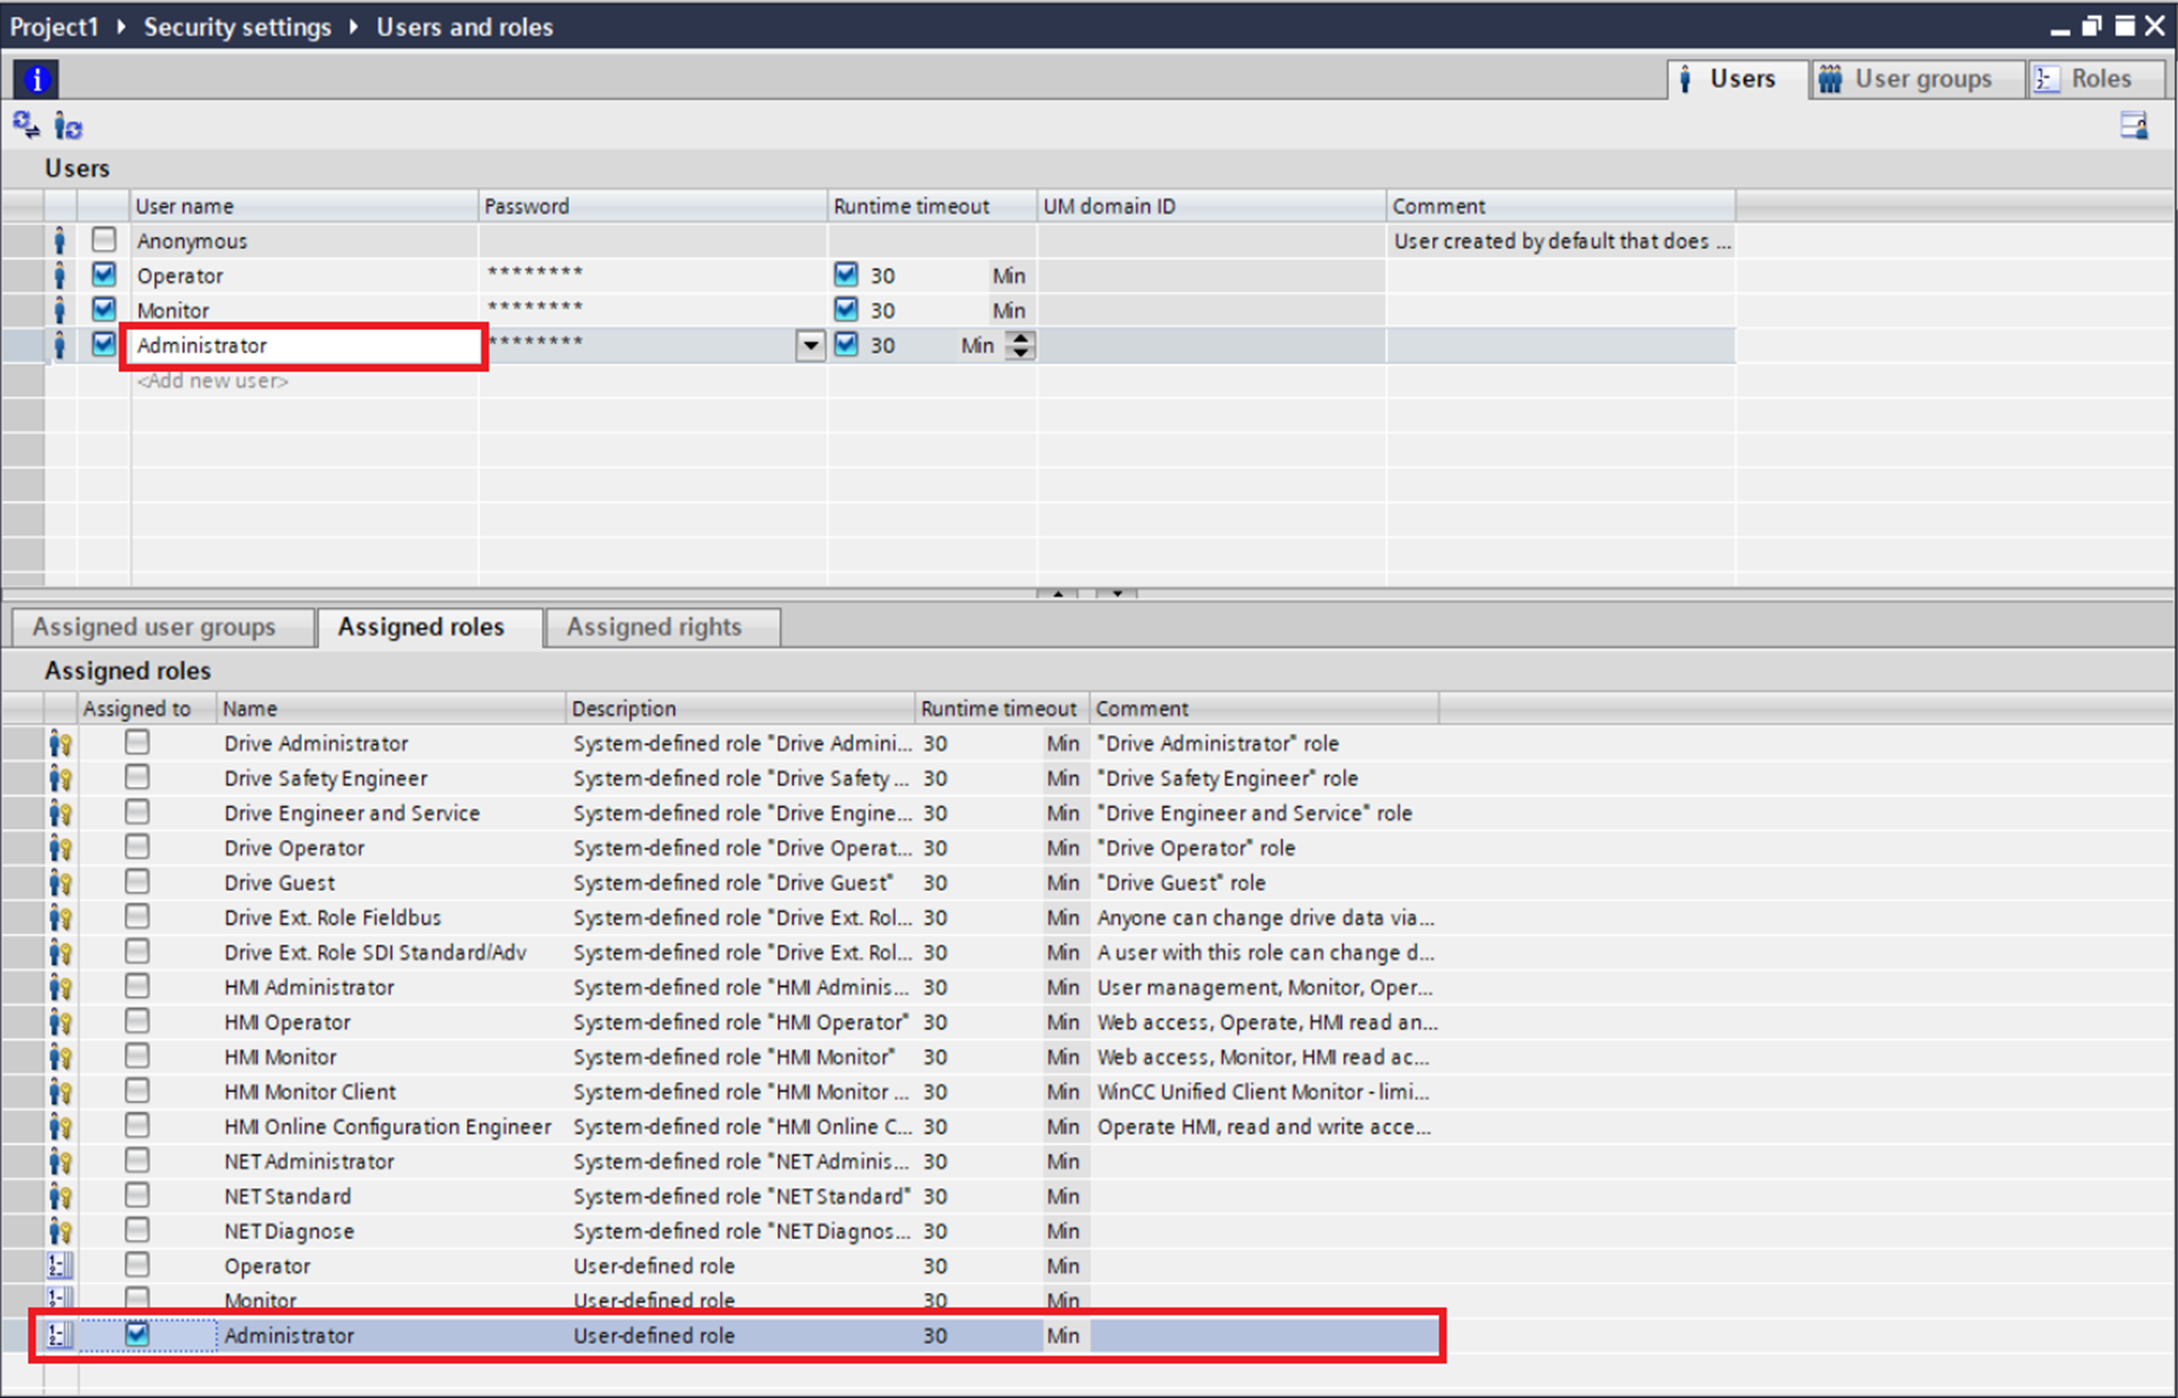
그 후 User and roles로 들어가서 사용자를 추가 해 보겠습니다.

저는 총 3단계의 보안등급을 설정했습니다.
- 단순히 설비의 상태만 확인 할 수 있는 Monitor 등급
- 간단한 조작을 할 수 있는 Operator 등급
- HMI의 모든 기능을 이용할 수 있는 Administrator 등급

그 다음 우측상단에 Roles로 들어가서 Role을 추가합니다.
(이 부분은 저처럼 새로 추가를 해도 되고 , 이미 만들어져 있는 Role을 사용해도 됩니다.)

아래와 같이 등급별로 접근 가능한 Function rights를 선택합니다.


그 후 다시 Users 탭으로 넘어간 후 화면 아래에 있는 Assign user groups 탭을 열어줍니다.

위에서 만들었던 Function right를 각 등급에 맞게 설정합니다.


이제 HMI화면으로 넘어가서 세팅을 마저 진행하겠습니다.
화면을 열고 각 버튼마다 등급을 지정합니다.


마지막으로 로그인상태를 모니터링 할 수 있는 User name 버튼도 하나 만들어 줍니다.

여기까지 완료하면 설정은 끝입니다.
설정이 잘 됬는지 시뮬레이션을 통해 확인해 보겠습니다.
처음 시뮬레이션 실행이 되면 유저 정보가 없기 때문에 User name에 DefaultUser라고 나옵니다.
옆에 버튼들은 모두 흐린색으로 표시가 됩니다. 이는 버튼을 사용할 권한이 없다는 것인데요.

이 상태에서 버튼을 누르게 되면 로그인 창이 뜹니다.

Operator로 로그인을 하게되면 Operator버튼이 활성화 되고 User name에도 마찬가지로 Operator로 변경이 된 것을 볼 수 있습니다.


이 상태에서 권한이 없는 Monitor버튼이나 Administrator버튼을 누르게 된다면 위와 마찬가지로 다시 로그인 창이 뜨게 되고 로그인이 완료되면 해당 버튼에 접근이 가능한 상태가 됩니다.
아래에 있는 화면은 모든 권한을 가지고 있는 Administrator 등급으로 로그인 한 결과 입니다.
User name도 마찬가지로 변경됬고 세가지 버튼들이 모두 활성화 된 것을 볼 수 있습니다.


'PLC > 지멘스' 카테고리의 다른 글
| Wincc Unified 사용자 로그 남기기 2 (GMP, Audit Trail) (0) | 2025.02.25 |
|---|---|
| Wincc Unified 사용자 로그 남기기 1 (GMP, Audit Trail) (1) | 2025.02.24 |
| WinCC Unified Simulation 세팅하기 (7) | 2025.02.17 |
| 지멘스 태그 코멘트 설정방법 (4) | 2025.02.05 |
| 지멘스 TIA Portal Trace 사용해보기 (1) | 2025.01.23 |